Invisible Fiber Optic Cable Installation
Whole-home fiber does not end at the optical network terminal. The last few meters — from the ONT to the TV, the gaming console, or the study desk — are where most FTTR jobs either look great or fall apart. Invisible fiber optic cable, the transparent self-adhesive drop sold under names like invisible cable, nano cable, or 2-wire flat cable, exists to close that gap without drilling holes or screwing clips into your trim. Done right, the run disappears into the baseboard and you never think about it again. Done wrong, you get a kinked fiber, a wall you have to repaint, and a callback. This guide walks through the complete installation workflow in seven steps, with the bend-radius limits, termination options, and test checks that keep a hidden run from turning into rework.
Before you start: pick the right invisible fiber optic cable
Not every transparent cable is the same cable. Check three things on the product you actually have in your hand before you plan a single meter of route.
- Fiber grade. Invisible drop cable uses bend-insensitive single-mode fiber. The ITU-T G.657 recommendation defines four grades (A1, A2, B2, B3); for wall-mount routing you want at least G.657.A2 (7.5 mm bend) and preferably G.657.B3, which is specified to survive a 5 mm bend radius. Products that claim tighter bends — the 600-micron EZ-Bend fiber in Lightera's InvisiLight kit, per the Fiber Broadband Association announcement, bends down to 2.5 mm — are already in B3 territory. Treat the 2.5 mm figure as product-specific, not a general license to fold the cable.
- Construction. An invisible cable is a tight-buffered single fiber with a transparent jacket and an integrated hot-melt adhesive layer, roughly 1 mm across (0.9–1.6 mm depending on the manufacturer). The tight buffer is what lets you handle it like a wire at all; FOA's cable basics reference explains how tight-buffer construction differs from loose-tube cable.
- Ends. Buy pre-terminated cable (factory-polished SC/APC or SC/UPC) whenever the run length is known. You cannot hand-polish this cable on site, and a factory polish is the difference between a 0.3 dB connection and a 3 dB one. When you must cut to length, plan for fast connectors or fusion splicing in Step 6 — and add that kit to your list below.
Spec to check | What you want | Why it matters |
|---|---|---|
Fiber grade | G.657.B3 (5 mm bend) minimum, G.657.A2 (7.5 mm) acceptable | Baseboard corners are where the bend-radius limit gets tested most |
Outer diameter | Roughly 1 mm (0.9–1.6 mm) | Thinner hides better; the thinnest cables need gentler handling |
Termination | Pre-terminated SC/APC when possible | On-site hand polishing is not an option for this cable class |
Tools and materials checklist
Keep everything in one box so you are not hunting mid-run:
- Invisible fiber cable, pre-terminated if lengths are known
- Hot-melt applicator or hot-air tool (the handheld heating tool that ships with most cable brands; a general-purpose hot glue gun set to a low temperature works in a pinch)
- Transparent corner protectors (at least one per 90° corner you will cross)
- Painter's tape (marking and temporary hold)
- Isopropyl alcohol wipes and lint-free cloths (connector cleaning)
- Measuring tape and a soft pencil
- Fast connector kit or fusion splicer + cleaver, if field-terminating
- Optical power meter (or OLTS) and a visual fault locator
- Grommets or brush plates if you will pass through walls
- Small snips for trimming the cable and adhesive tails
General fiber installation practice is covered in FOA's installation reference; the steps below are the invisible-cable-specific version of the same discipline.
Step 1: Plan the route and measure the run
Walk the path before you heat anything. Start at the device end (the ONT's SC port, or the router if you are extending with media converters) and trace to the far end of the room.
- Pick the line of least visibility: along the baseboard (easiest to hide), over the top of door frames, behind curtain rails, or through the corner where wall meets ceiling.
- Stay away from radiators, hot-water pipes, sharp furniture edges, door hinges, and any spot where a foot or a vacuum cleaner will rub the cable.
- Measure with slack. Add 10% to the measured path, plus 0.5 m of service loop at each end. A run that fits "exactly" is a run you cannot terminate twice.
- Mark the path with painter's tape at 1 m intervals. This is also your dry-run: tape the whole route loosely first and walk it again. If the path feels awkward on the second pass, re-route now, not after the adhesive is on.
Step 2: Prepare the surface
The hot-melt layer bonds to a clean, dry, reasonably smooth surface. Skip this step and the adhesive will let go within days.
- Wipe the baseboard or frame with isopropyl alcohol, let it dry completely, and degrease any spots touched by hands or furniture polish.
- Test adhesion on a hidden spot first — behind the TV or under a window sill — especially on textured wallpaper, painted wood, or aged lacquer. Press a 10 cm sample, let it cool, and try to peel it. If it lifts easily, that surface needs a different approach (see the corner/transition section below).
- Work at room temperature. Below about 15 °C the adhesive sets before it bonds; above 30 °C it stays soft and the cable will sag. Cold surfaces fail fastest.
Step 3: Lay and fix the cable along baseboards and door frames
Work in short segments of 30–50 cm — this is the step where most invisible fiber optic cable installation errors happen, and they all come from rushing.
- Heat the adhesive side of the cable with the hot-melt tool, moving the heat along the segment, not standing in one spot. Follow the temperature range printed on the cable spool; overheating melts the transparent jacket and shows up later as a milky, brittle section.
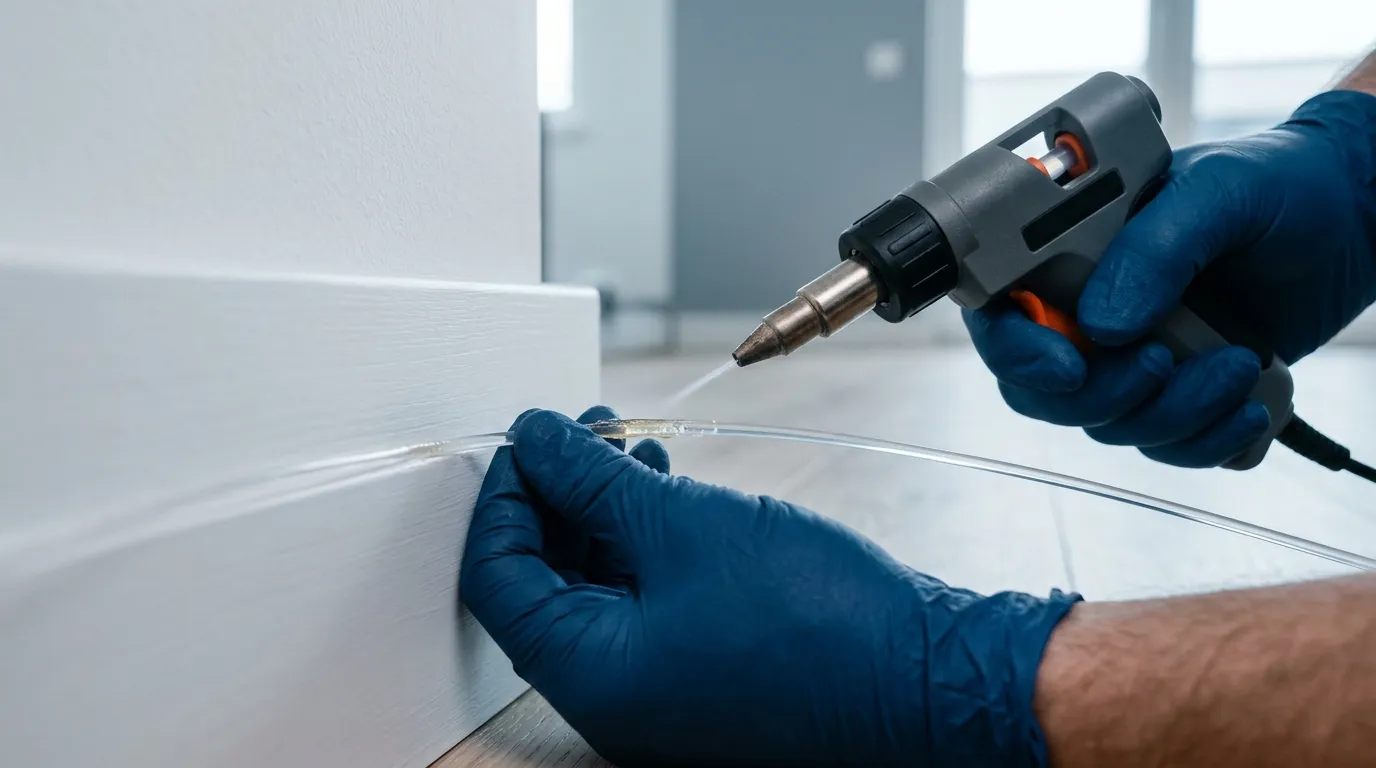
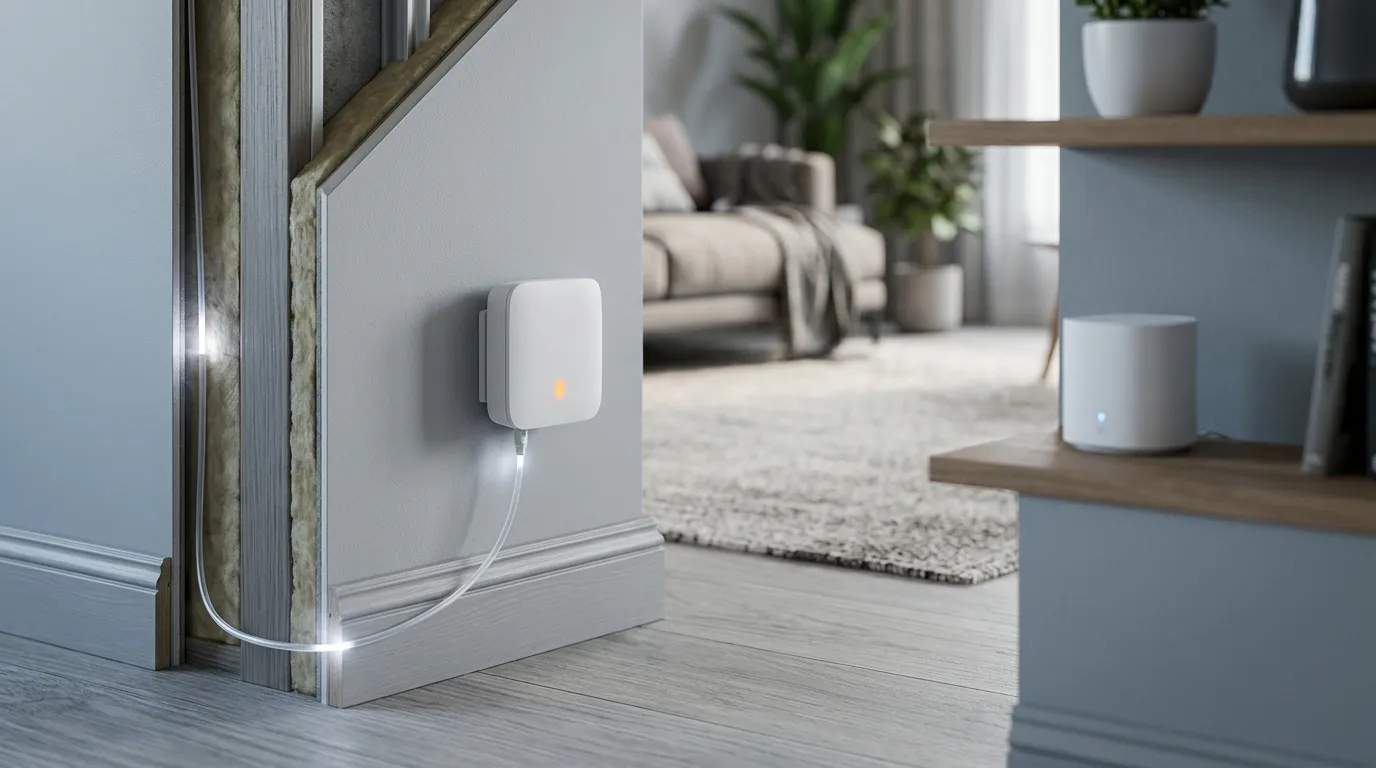
Figure: the applicator heats only the adhesive layer — the fiber itself stays cool and unstrained.
- Press the cable into place immediately while the adhesive is molten. Work from one end of the segment to the other with your thumb or a folded cloth, squeezing the adhesive flat. Hold each point for 5–10 seconds until the bond sets.
- Keep light tension along straight runs — enough to avoid slack, never enough to stretch the fiber. Never pull on the connector body to straighten a run.
- Let the segment cool completely before starting the next bend or turn. Hot adhesive flexes; cooled adhesive holds.
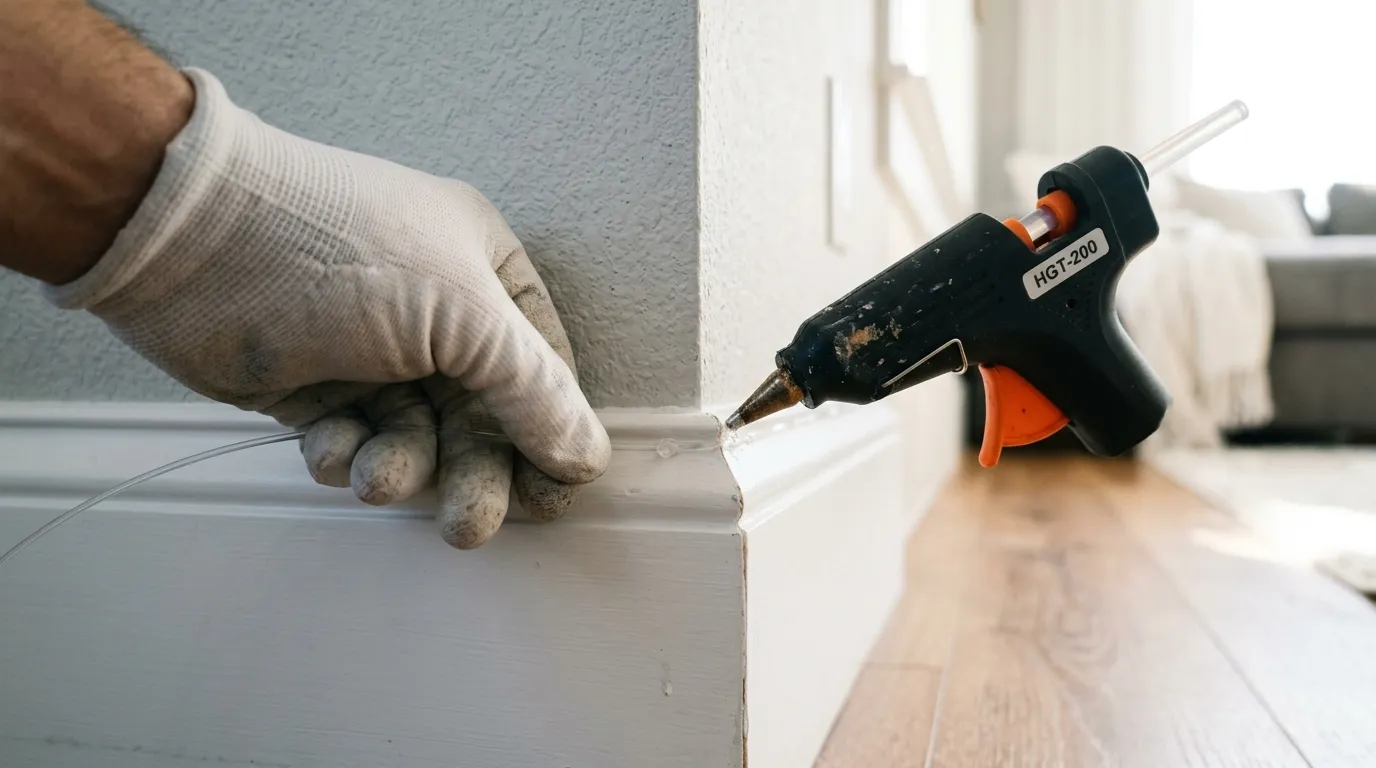
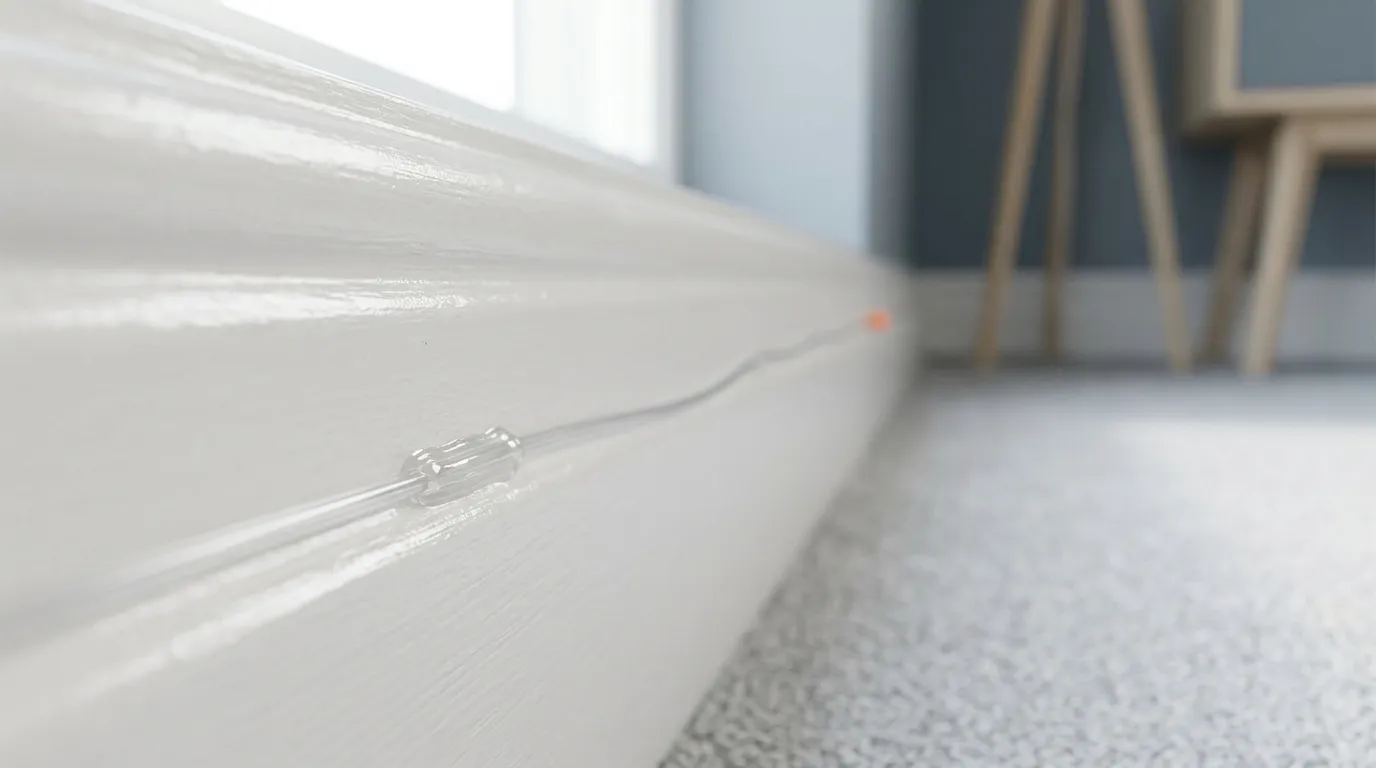
Figure: the cable disappears once the transparent adhesive layer is pressed flat against the baseboard.
Step 4: Handle corners, thresholds, and transitions
Corners are where hidden fiber runs die. The red line: never bend the cable tighter than its specified minimum bend radius — 5 mm for G.657.B3, more for A2 — and never kink or pinch it. A kink is a broken fiber that still looks fine from the outside.
- Inside corners (wall meets wall): route the cable with a gentle arc, not a fold. If the arc pokes out of the corner, cover it with a transparent corner protector — it guides the fiber through a controlled radius and hides the transition.
- Door frames: run along the frame itself rather than across the doorway. At the hinge side, keep the cable on the frame face; doors closing on the cable are a guaranteed crush failure.
- Thresholds: do not run cable under a door that closes onto it. Use a low-profile transition strip on the threshold, or route over the top of the frame instead.
- Outside corners (window sills, pillars): same rule — radius, not angle. A corner protector on outside corners also stops the cable from being knocked off by passing traffic.
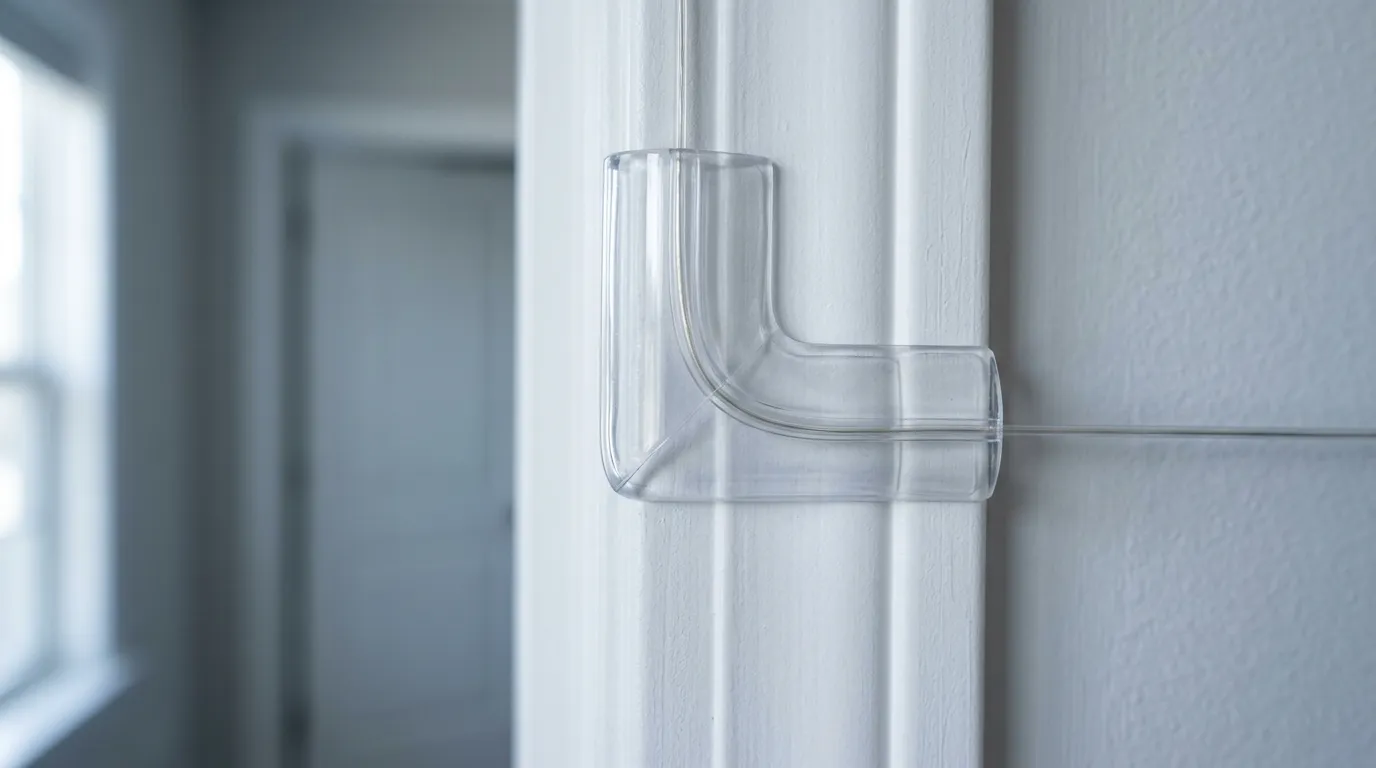
Figure: a corner protector holds the fiber at a safe radius and hides the turn completely.
Step 5: Pass through walls into the next room
When the route crosses into another room, you have three options, in order of preference:
- Drill a small hole (6–8 mm) through the wall at a point hidden behind a baseboard or the frame, feed the cable through, and cover both sides with a grommet or brush plate. This is the cleanest result and the only one that reads as "invisible" from both sides.
- Run over the top of the door frame — no drilling, but the cable is exposed for the short crossing. This is the standard choice in rentals.
- Follow an existing conduit or cable duct if the building has one (for example a coax or Ethernet duct). The invisible cable is thin enough to share most ducts, but never force it — tight packed ducts will pinch.
Leave a 0.5 m service loop inside each room before terminating, coiled loosely (minimum bend radius applies to the loop too) and tucked behind the baseboard or inside the wall cavity. This is your re-termination slack for the next five years.
Step 6: Connect or terminate the cable ends
- Pre-terminated cable: clean both connectors with a lint-free wipe or one-click cleaner, leave the dust caps on until the moment of mating, and push the SC connector in until it clicks. Match the polish — green APC to APC, blue UPC to UPC; the fiber optic connector types guide explains why mixing APC and UPC is one of the fastest ways to turn a fresh install into a mystery fault.
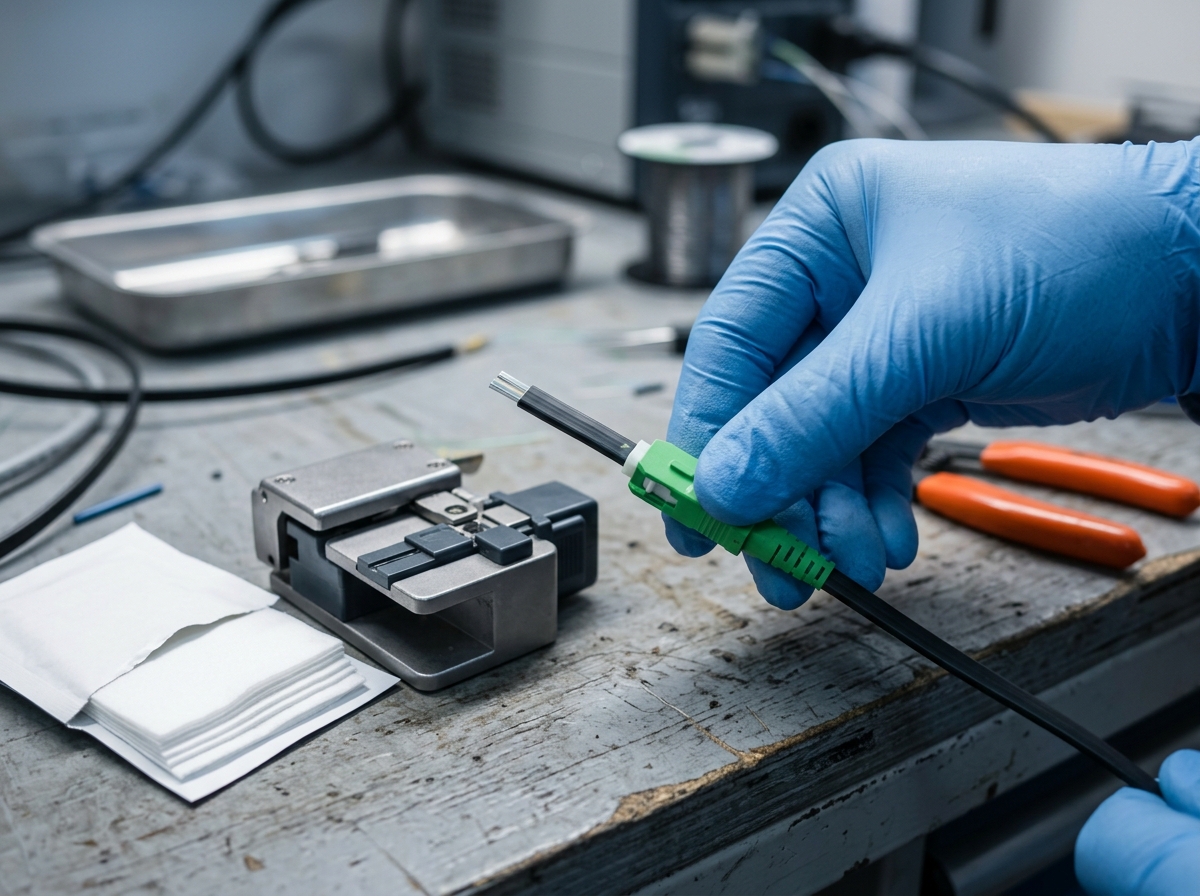
- Field termination: cleave the fiber at 90° with a precision cleaver, then install a fast connector (mechanical splice) or fusion-splice to a pigtail. Practice on offcuts before touching the live run — a bad cleave is the number-one cause of field-termination failure. If the manufacturer offers fast connectors for its own cable, use those; they are matched to the cable's diameter.
- Media converters: if the far device has no fiber port (most TVs and consoles do not), a pair of media converters bridges copper to fiber — fiber into the converter's SC port, Ethernet out to the device. Power both units before blaming the cable.
- Never bend the cable within about 10 cm of a connector. That short straight section is where micro-cracks from handling start.
Step 7: Test the link before you clean up
Testing is what separates a pro install from a "it worked when I left" install.
- Visual fault locator first. Shine the red laser into one end. If you see a bright red spot along the route, that is a break or a tight kink — fix it before anything else. A clean invisible cable shows no light leakage along its length.
- Measure the loss. Reference the optical power meter at the source, then measure at the far end. For a sub-50 m indoor drop with factory-polished connectors, a healthy link reads well under 1 dB total (roughly 0.2–0.3 dB per connector, negligible fiber loss at this distance).
- If the reading is above ~2 dB: clean and re-seat both connectors, inspect every bend, and re-check corners. If it stays high, the fiber is damaged inside the jacket — replace that segment rather than chasing it.
- Record the reading in the job file or handover sheet. If you ever get a callback, that number tells you whether the fiber was healthy on day one.
Common mistakes that shorten invisible fiber runs
- Pinching with clips or staples. Flat cable clips that crush the jacket are the top killer. Use clips designed for flat cable, or no clips at all — the adhesive is the mounting system.
- Bending below the minimum radius at corners and loops. Bend-insensitive fiber is not bend-proof; it just gives you more room before the loss spikes.
- Skipping surface prep. A run that survives the first week on a dirty baseboard will not survive the first season.
- Overheating the adhesive. Too much heat melts the jacket; the run looks fine for months, then goes milky and brittle.
- Pulling on the connector to straighten the run, or coiling the cable too tightly for transport.
- Mixing APC and UPC connectors on one link.
- No service loops. When the connector fails in year two, there is no slack to re-terminate with.
- Running through door hinges or under closing doors. Crush failures are invisible from the outside — until the link drops.
Where invisible cable fits in an FTTR deployment
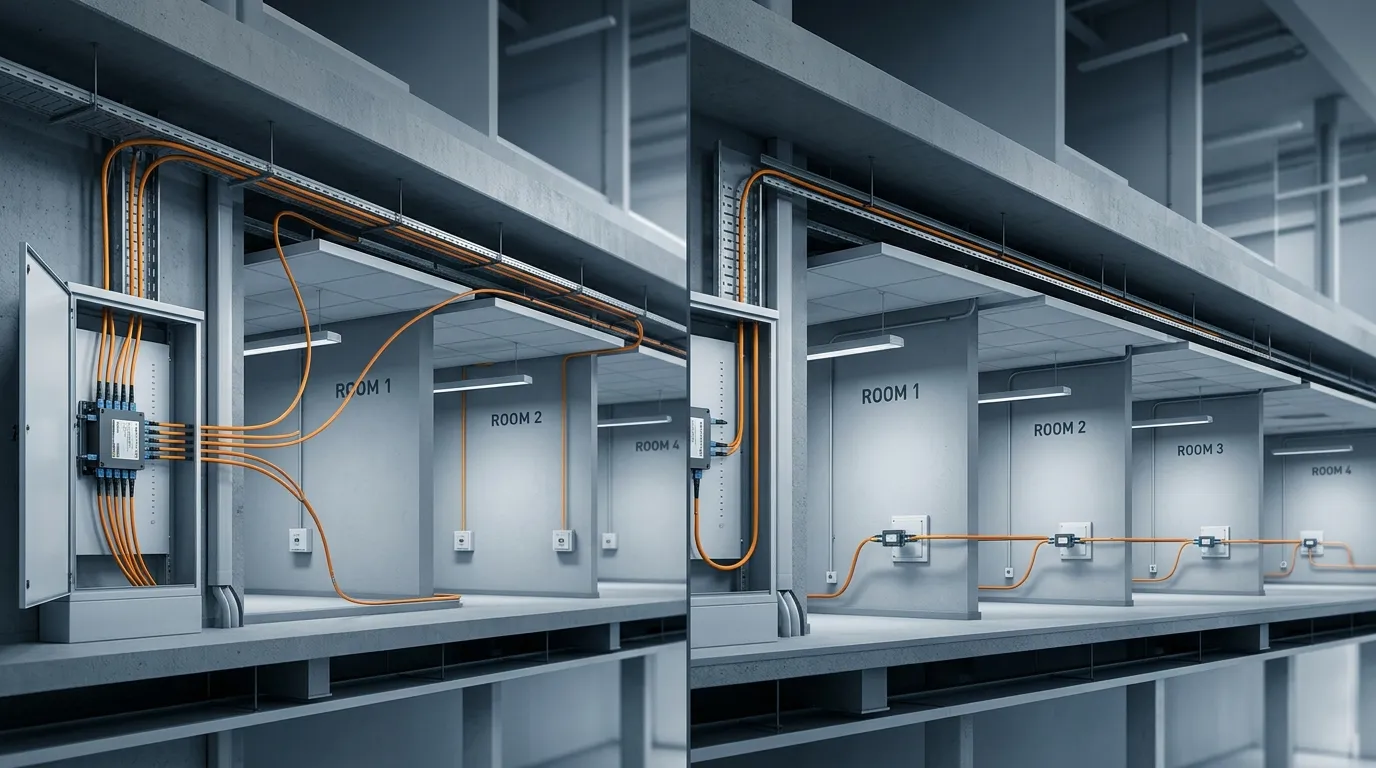
FTTR (Fiber to the Room) replaces the Wi-Fi repeater chain with real fiber to each room: one master ONT at the intake and an optical path to every room's ONU. If you are new to the architecture, start from the whole-home FTTR optical network hub — what FTTR is covers the basics, and FTTR topology design shows how the rooms connect before you quote a job.
Invisible fiber cable is the last-drop medium of that architecture — the visible part between the room's ONU and the device, or the hallway run from the master ONT to the first room. It is not the backbone; it is the finish work. A typical apartment job is three to six runs of 10–40 m, and the hot-melt method is faster than conduit on every one of them: no drilling, no trunking, no painting afterwards. For installers, that speed is the margin. For residents, the selling point is simple — you can see the fiber or you cannot, and with this method you cannot.
Two practical notes from the field:
- Keep a spool of cable, a handful of corner protectors, and a fast-connector kit in the van. The single most common on-site surprise is "the room layout changed since the quote", and all three turn that into a 20-minute fix.
- The adhesive method is fast but not infinitely reusable: a run that is pulled off and repositioned loses bonding strength. Re-position once if you must; beyond that, peel and re-run fresh cable rather than fighting it. If you are still deciding between the whole-home fiber path and a mesh of access points, the FTTR vs. mesh Wi-Fi breakdown covers the trade-off in detail.
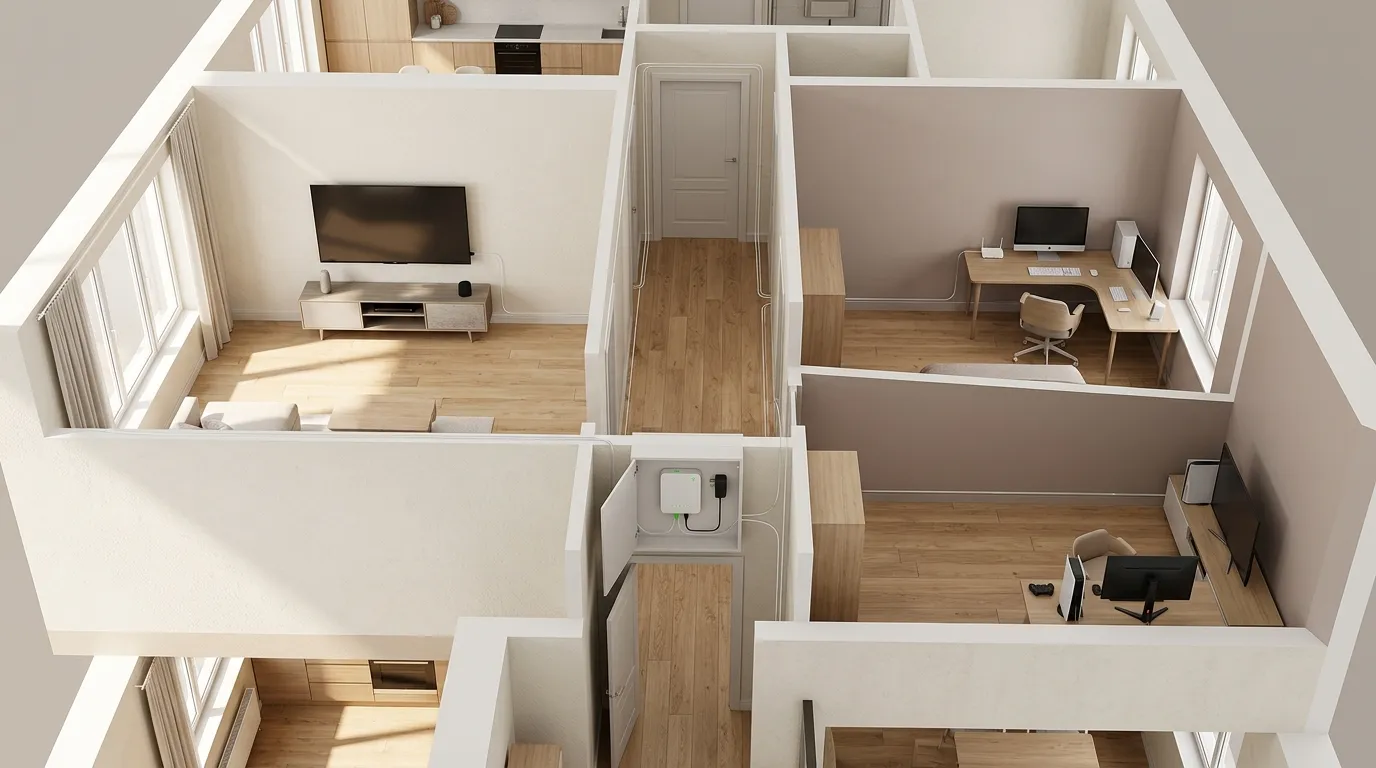
Figure: in a whole-home FTTR optical network, invisible cable carries the finish drops from the ONT to each room's devices.
Invisible cable vs. the other ways to hide a drop
Method | Look | Speed | Wall damage | Best for |
|---|---|---|---|---|
Invisible fiber (hot-melt) | Nearly invisible | Fast (~20 min/room) | None | Finished homes, rentals, wooden trim |
Mini raceway / trunking | Visible but tidy | Medium | None (adhesive) | Runs that need to be opened and serviced |
In-wall conduit (drilled) | Fully hidden | Slow (cutting, threading) | Holes/channels | Renovations and new builds |
Flat 2-wire surface cable | Visible | Fast | None | Replacing copper where a duct already exists |
Round drop + cable clips | Clearly visible | Fast | Clip holes | Closets, garages, anything aesthetic-free |
There is no wrong answer in that table — only the wrong answer for the room. The invisible method wins whenever the client's first question is "will it show?" and the wall is in finished condition.
FAQ
How do you hide fiber optic cable without drilling? Use invisible fiber optic cable with its hot-melt adhesive layer: clean the baseboard, heat the adhesive side, press the cable on, and cover corners with transparent corner protectors. The full procedure is in Steps 1–4 above.
Can you paint over invisible fiber cable? You can touch up the ends with the same paint as the wall, but painting the whole run dulls its transparency and can weaken the adhesive. Most installers leave the cable unpainted and hide it with placement instead.
Can you cut invisible fiber cable and re-terminate it? Yes, with a fast connector or fusion splice (Step 6). What you cannot do is hand-polish a factory-terminated end after cutting it off — that is why pre-terminated runs should be cut only when the length is known. Once a factory-polished end is damaged, the cable cannot be spliced back together; Lightera's kit documentation says the same for its pre-terminated product, and the honest fix is replacing the segment.
How long does the adhesive hold? On a clean, dry surface, years — which is also why surface prep in Step 2 is non-negotiable. The two things that shorten its life are heat (radiators, direct sun on dark trim) and re-positioning a run after it has set.
Can invisible fiber cable run outdoors? No. It is an indoor product with a transparent jacket; use outdoor-rated drop cable for anything outside the building envelope.
What about brick or textured walls? The hot-melt layer bonds poorly to rough brick. Either run the cable inside a trunking on the brick, or switch to the drilled in-wall method at that point.
What to do with the run you just installed
Seven steps, three red lines: keep the bend radius, never pinch, terminate clean. Follow them and an invisible fiber run stops being a "hidden risk" and becomes the quiet part of the job — the part the client notices only by its absence. When you are stocking the next job, pre-terminated invisible fiber optic cable with SC/APC ends, corner protectors, and a fast-connector kit will cover almost every finished-home drop you are likely to quote. If you need the cable itself, TTI Fiber's invisible fiber optic cable ships with the transparent jacket, G.657.B3 fiber, and factory termination options — sized for FTTR and FTTH last drops.